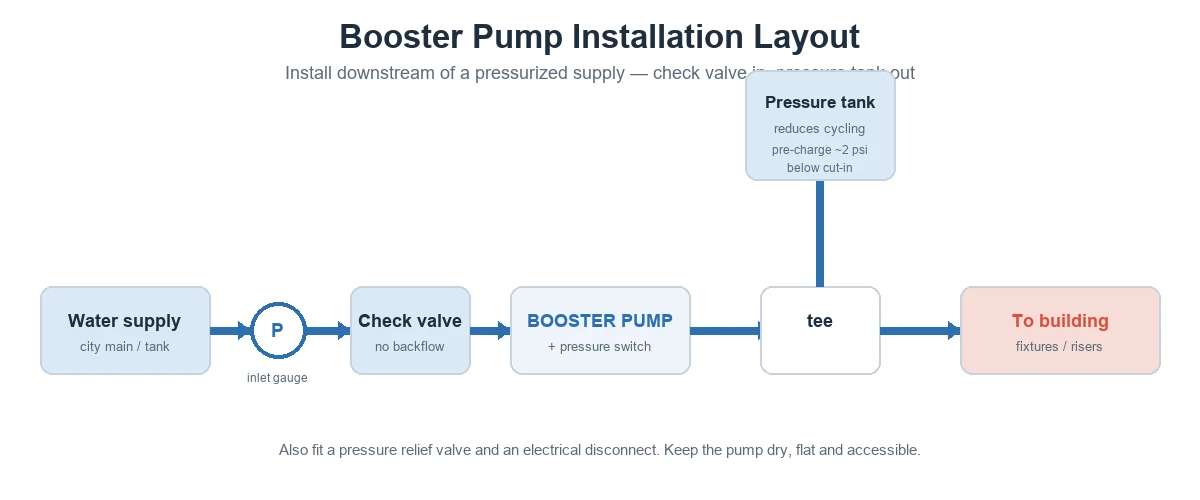
Booster pump installation means fitting the pump downstream of a pressurized water supply, with a check valve on the inlet, a pressure tank on the outlet, and the right controls and safety devices. Done correctly, it delivers stable pressure and avoids rapid cycling and dry-running damage.
This guide covers where to install a booster pump, what the installation includes, the steps, and the mistakes to avoid. For the basics first, see what a booster pump is and our booster pump guide.
Part 1. Where should you install a booster pump?
Install the pump downstream of a pressurized source — a city water main, a pressure tank, or a gravity-fed supply. A booster raises existing pressure; it should not be used to draw water from a dry source.
- Choose a dry, flat, accessible spot close to the supply line.
- Keep it away from heat sources and damp areas to limit vibration, noise and premature wear.
- Keep the pump near its pressure switch and within reach of a power connection.
For multi-floor and high-rise installs, account for elevation: water loses about 4.3 psi for every 10 ft (3 m) of vertical lift, so the pump must add enough head to reach the top floor at the target pressure. Add friction losses on top of that.
Tip: A dry, flat, accessible location makes service easier and reduces vibration and noise — mount away from bedrooms and living spaces where possible.
Part 2. What does a booster pump installation include?
A complete installation is more than the pump. These components protect it and stabilize pressure:
| Component | Role |
|---|---|
| Inlet pressure gauge | Shows available supply pressure before the pump |
| Check valve (inlet) | Prevents backflow when the pump stops |
| Booster pump + pressure switch | Raises pressure; switch starts/stops on demand |
| Pressure tank (outlet) | Reduces rapid cycling and stabilizes pressure |
| Pressure relief valve | Protects the system from overpressure |
| Electrical disconnect | Safe isolation for service |
Part 3. Booster pump installation steps
Before you start, gather what the job needs: the pump and its IOM, an inlet check valve, a correctly sized pressure tank, unions and fittings, an inlet pressure gauge, thread sealant, and isolation valves on both sides so the pump can be serviced without draining the system.
- Shut off the water supply and relieve line pressure.
- Mount the pump on a dry, flat, accessible base downstream of the supply.
- Fit a check valve on the inlet side to stop backflow.
- Connect the pump inlet to the supply and the outlet toward the building.
- Tee a correctly sized pressure tank into the outlet line.
- Pre-charge the tank to about 2 psi below the pump cut-in pressure (e.g., 38 psi for a 40 psi cut-in), checked at the Schrader valve.
- Wire the pump and pressure switch through an electrical disconnect (use a licensed electrician).
- Open the supply, prime/flood the pump, then power on and check pressure and for leaks.
Important: Follow the pump’s IOM and local plumbing/electrical codes, and use licensed trades for wiring and pressurized connections. Never run the pump dry.
Part 4. Check valve and pressure tank placement
Two parts decide whether the system runs smoothly:
Check valve — on the inlet. It stops water flowing backward when the pump stops; without it, pressure drops, air can enter, and the pump can be damaged by reverse flow.
Pressure tank — on the outlet, via a tee. A correctly sized, correctly pre-charged tank prevents short-cycling, reduces motor wear, and steadies pressure. Pre-charge to about 2 psi below cut-in.
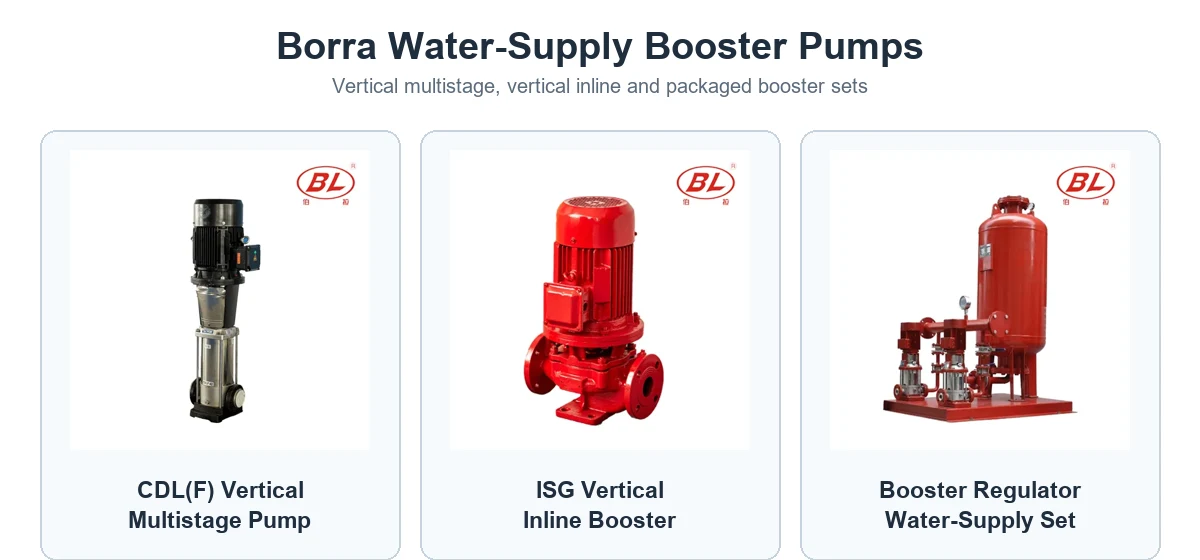
Pick the right pump first — single-stage, multistage, inline or a packaged set — based on the pressure and flow you need; see the booster pump guide for types.
Part 5. Common installation mistakes
| Mistake | Result | Fix |
|---|---|---|
| No inlet check valve | Backflow, lost pressure, pump damage | Always fit a check valve on the inlet |
| Wrong location (damp/uneven/hot) | Vibration, noise, early wear | Dry, flat, accessible base away from heat |
| Undersized or wrongly pre-charged tank | Rapid short-cycling, motor wear | Size the tank; pre-charge ~2 psi below cut-in |
| Running the pump dry | Seal and impeller damage | Ensure inlet water; add dry-run protection |
| Skipping code / licensed trades | Safety and compliance risk | Follow IOM and local code; use licensed electrician/plumber |
Part 6. After installation: testing and maintenance
Commissioning confirms the install is safe and stable before handover:
- Prime and vent the pump, then open the supply and power on.
- Check the inlet and outlet pressure and confirm the pump reaches the target without exceeding ~80 psi.
- Watch for short-cycling; if the pump starts and stops rapidly, recheck tank size and pre-charge.
- Inspect all joints for leaks and confirm the check valve holds when the pump stops.
Ongoing, check the pressure-tank pre-charge periodically, keep the area dry and accessible, and service per the pump’s IOM. Variable-speed (VFD) sets need little adjustment but should still be checked for stable set pressure.
Tip: Record the cut-in/cut-out and tank pre-charge at handover; it makes future troubleshooting (e.g., short-cycling) much faster.
FAQ
Where exactly should a booster pump be installed?
Downstream of a pressurized supply (main, tank, or gravity feed), on a dry, flat, accessible base, close to the pressure switch and a power connection.
Do I need a check valve with a booster pump?
Yes. A check valve on the inlet prevents backflow when the pump stops; without it you risk pressure loss, air ingress and pump damage.
Where does the pressure tank go?
On the outlet side, teed into the discharge line. It reduces rapid cycling and stabilizes pressure.
What pre-charge should the pressure tank have?
About 2 psi below the pump’s cut-in pressure — for a 40 psi cut-in, set roughly 38 psi at the tank’s Schrader valve.
Can I install a booster pump myself?
Mechanical fitting is straightforward, but wiring and pressurized connections should follow the IOM and local code; use a licensed electrician/plumber where required.
Why does my booster pump short-cycle after installation?
Usually an undersized or incorrectly pre-charged pressure tank, or an oversized pump. Check tank size and pre-charge first.
How long does a booster pump installation take?
A straightforward residential install is often a few hours; commercial or high-rise packaged sets take longer and may need coordination with electrical and controls trades.
Does a booster pump need maintenance after installation?
Yes — periodically check the pressure-tank pre-charge, look for leaks, confirm stable set pressure, and service per the IOM. Correct sizing and a clean inlet extend service life.
Should I add isolation valves?
Yes. Isolation (shut-off) valves on the inlet and outlet let you service or replace the pump, check valve or pressure tank without draining the whole system, which saves time on future maintenance.
References
- Dultmeier installation guide
- Ekki — pressure booster IOM
- Callaghan Pump — installing variable booster pumps
- Hydraulic Institute — pump standards
Need help specifying a booster set? Share your flow, head, inlet pressure and application, and Borra’s team will recommend the right booster / water-supply equipment.